

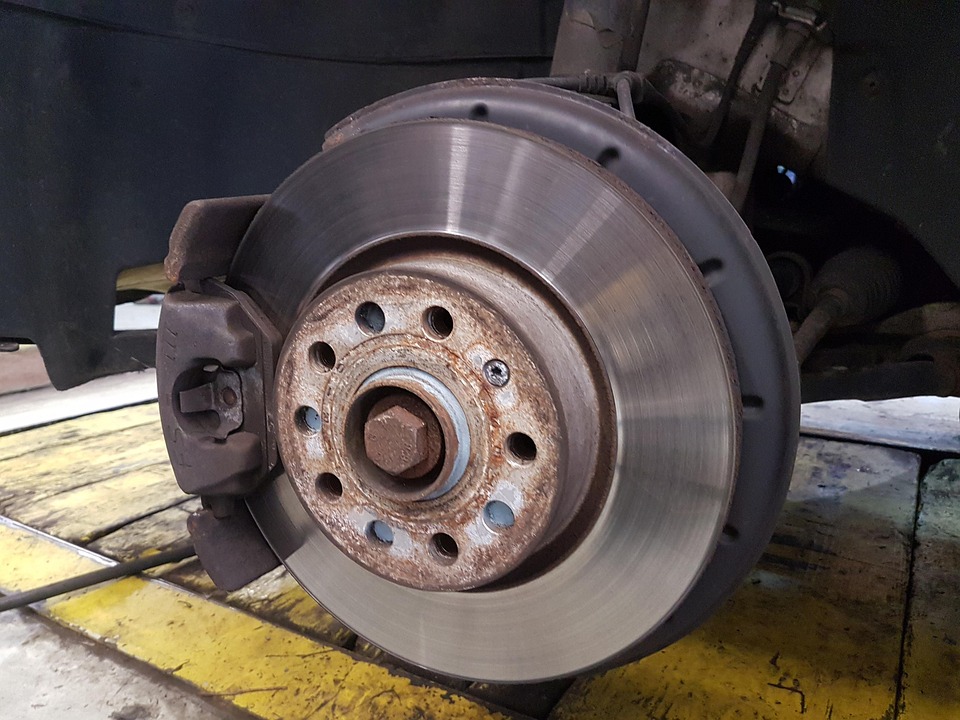
Brake pad replacement is a fundamental aspect of vehicle maintenance, crucial for ensuring safe driving conditions. Whether you’re a seasoned DIY enthusiast or a beginner, mastering the process of replacing brake pads can save you money and give you insight into your vehicle’s functionality. This guide will walk you through each step of the brake pad replacement process, ensuring you have the knowledge and confidence to tackle the job yourself.
Understanding Brake Pads
Brake pads are an integral component of the braking system. They are responsible for converting kinetic energy into thermal energy through friction, which slows down your vehicle. Over time, brake pads wear out and need to be replaced to maintain effective braking performance.
Types of Brake Pads
1. **Organic Brake Pads:** Made from non-metallic fibers bonded with resin, these pads are quiet and gentle on rotors but wear out faster.
2. **Semi-Metallic Brake Pads:** Composed of metal shavings and resin, they offer good performance and durability but can be noisy.
3. **Ceramic Brake Pads:** Known for their longevity and quiet operation, ceramic pads produce less dust but are typically more expensive.
Signs That You Need to Replace Your Brake Pads
– **Squealing or Screeching Noise:** Most brake pads have wear indicators that produce a high-pitched noise when it’s time for replacement.
– **Reduced Braking Performance:** If you notice that your car takes longer to stop, it may be time to inspect your brake pads.
– **Vibration:** A vibrating brake pedal can indicate worn brake pads or warped rotors.
– **Visual Inspection:** Look for thinning pads through the spokes of your wheels. If they appear less than 1/4 inch thick, consider replacing them.
Tools and Materials Needed
Before starting the replacement process, gather the necessary tools and materials:
– New brake pads
– Car jack and jack stands
– Lug wrench
– C-clamp
– Wrench set
– Brake grease
– Screwdriver
– Gloves and safety glasses
– Torque wrench
Step-by-Step Guide to Replacing Brake Pads
Step 1: Preparation
1. **Park Your Vehicle on a Level Surface:** Ensure the car is on a flat, stable surface and engage the parking brake.
2. **Loosen Lug Nuts:** Use a lug wrench to slightly loosen the lug nuts on the wheels you will be working on. Do not completely remove them yet.
Step 2: Lifting the Vehicle
1. **Position the Car Jack:** Place the car jack under the vehicle’s jacking points, as specified in the owner’s manual.
2. **Lift the Vehicle:** Carefully raise the vehicle using the jack, then secure it with jack stands for safety.
Step 3: Removing the Wheel
1. **Remove Lug Nuts:** Completely unscrew and remove the lug nuts, then take off the wheel to access the brake assembly.
Step 4: Accessing the Brake Pads
1. **Locate the Brake Caliper:** The brake caliper houses the brake pads.
2. **Remove the Caliper Bolts:** Use a wrench to remove the bolts holding the caliper in place.
3. **Slide Out the Caliper:** Carefully remove the caliper from the rotor. Support it with a piece of wire or rest it on the suspension to avoid straining the brake hose.
Step 5: Removing the Old Brake Pads
1. **Take Out the Old Pads:** Slide the old brake pads out of the caliper bracket.
2. **Inspect the Rotor:** Check the rotor for any signs of damage or wear. If necessary, have it resurfaced or replaced.
Step 6: Installing the New Brake Pads
1. **Apply Brake Grease:** Apply a small amount of brake grease to the back of the new brake pads to reduce noise and ensure smooth operation.
2. **Insert New Pads:** Slide the new brake pads into the caliper bracket, ensuring they are securely in place.
Step 7: Reassembling the Brake System
1. **Compress the Caliper Piston:** Use a C-clamp to slowly compress the caliper piston back into its housing. This step is crucial to accommodate the thickness of the new pads.
2. **Reattach the Caliper:** Position the caliper over the new brake pads and rotor, then secure it with the bolts you previously removed. Tighten the bolts to the manufacturer’s specified torque using a torque wrench.
Step 8: Reinstalling the Wheel
1. **Position the Wheel:** Place the wheel back onto the hub.
2. **Hand-Tighten Lug Nuts:** Start threading the lug nuts by hand to ensure they don’t cross-thread.
3. **Lower the Vehicle:** Carefully lower the vehicle to the ground and remove the jack stands.
4. **Tighten Lug Nuts:** Use a lug wrench to fully tighten the lug nuts in a crisscross pattern to ensure even pressure.
Step 9: Testing the Brakes
1. **Pump the Brake Pedal:** Before driving, pump the brake pedal a few times to seat the new brake pads and restore hydraulic pressure.
2. **Test Drive:** Take your vehicle for a short, controlled test drive to ensure the brakes are functioning smoothly.
Conclusion
Replacing brake pads is a rewarding DIY task that enhances your understanding of your vehicle’s braking system. While the process may seem daunting at first, following this step-by-step guide will help you perform a brake pad replacement with confidence. Remember, safety is paramount, so always double-check your work and consult your vehicle’s manual for specific instructions related to your make and model.
Additional Tips
– Always replace brake pads in pairs (front or rear) to maintain even braking.
– Consider replacing the brake hardware, such as clips and springs, for optimal performance.
– If you’re unsure about any step, seek guidance from a professional mechanic.
By following this comprehensive guide, you’ll be well-equipped to master the art of brake pad replacement, ensuring your vehicle remains safe and reliable on the road.
#ChatGPT assisted in the creation of this article.
